 | | | | | | | | | | | | | | | | | | | |
|  | |  |  | |
| | |
| | |  | |
| | | |
|  | | | |
| | |
| | |
| | |  |
| | |
| | | | I have noticed when I turn on my heater at night when the headlights were on, everything would dim and my voltmeter gauge has gone as low as 11 volts while at idle. I heard about how easy it was swapping in a 130 amp 3G alternator from a 1994-95 Mustang GT with the 5.0L engines so I figured I'll give it a try. As luck would have it, I had a 1/3 off any order from Carparts.com at the time so I bought one from them. The other things you need to do this swap is: a stator plug (I bought this from an alternator shop for $5), 3 feet of 8 gauge wire, two 8 gauge ring terminals, a 12 gauge ring terminal, a 2" grade 8 bolt, nut, and two washers, 3 feet of 1/2" wire loom, and 8 gauge and 12 gauge heat shrink tubing. I got most of my information from a Mustang page with much more detailed information. The setup for my Bronco is almost the same as the Mustang setup.
| |
|
|
|  | | |
| | |
|  | | |
| | |
|  | | |
| | |
|  | | |
| | |
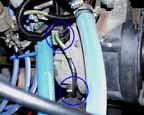
| | | | The first thing to do is to disconnect the battery. Then locate and unplug the two plugs on the alternator. Also unplug the green wire near the starter solenoid and remove the black wire from the starter solenoid. You can now remove the whole harness from the truck.
| |
|
| |
| | | |  |
| | | |
|  | | | |
| | | |
| | |
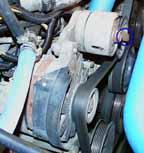
| | | | The next thing to do is to remove the serpentine belt from the alternator pulley. It is not necessary to remove the belt from the truck completely. To loosen the belt, you rotate the tensioner in a counter-clockwise direction with a wrench. The longer the wrench, the easier it is to do. I used a box wrench with a 3 foot pipe which allowed me to loosen it easily with one hand while moving the belt with the other hand.
| |
|
| |
| | | |  |
| | | |
| | |
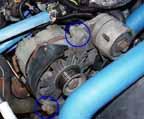
| | | | Next, remove the upper and lower mounting bolts. After taking the bolts out, pull out the alternator. It may be difficult to remove the alternator due to some corrosion and a very tight fit on the lower mount.
| |
|
| |
| | | |  |
| | | |
| | |
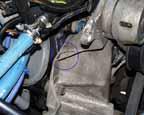
| | | | Some minor bracket modifications are necessary to fit the new 130 amp alternator. I test fitted my new alternator and then I marked the area on the upper mount that needed to be cut with a black marker and removed the material with a die grinder. The bracket is made of aluminum so it isn't too hard to do.
| |
|
| |
| | | |  |
| | | |
| | |
| | | | The lower part of the bracket requires more cutting than the upper. I again marked the area needed to be trimmed and I used a combination of a 3" cut-off tool, a die grinder, and a Dremel moto-tool. This took me a while to do because of the awkward angle and not having the right grinding bits with me.
| |
|
| |
| | | |  |
| | | |
| | |
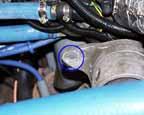
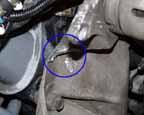
| | | | This shows you what the finished cut looks like. There wasn't that much to remove and it was pretty soft aluminum. I would recommend having a dust mask as the aluminum shavings get everywhere- you can see some on my valve cover.
| |
|
| |
| | | |  |
| | | |
| | |
| | | | |
| | |
| |
| |  |
| |
| | | |
| |
| |  | |
| |
| |   | |
| |
| | | | | | Page last updated on October 18th, 1999
| | | |
|
| |